Once again I am excited to link up with 4th Grade Frolics for Monday Made It.

I attended a FANTASTIC professional development session last week by Andrew Douch about using technology to enhance student learning. Please visit his website, as he really is a wealth of knowledge. Douch introduced us to Aurasma, an app that uses the same technology that is used for QR codes. Basically, you link a photo with a video. When you scan over the photo, the video begins to play on your device. So here is my Monday Made It – I made an Aura!
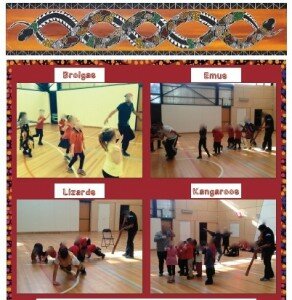
In some ways this is simply cool. But there are also some practical uses that are pretty incredible. This week we had a visit from some Aboriginal guests who did some dancing with our students. I took some video of groups of students dancing as brolgas, emus, kangaroos, and lizards. I then created a portfolio page with four photos on it (one for each animal group.) At first glance it looks like a photo page of the experience. But, when you scan over each image you can watch a movie of the dance.
Now, I would love to share all of this with you, but I am not comfortable putting photos and videos up of my students that are not edited to cover their faces.
However, this post would not be very helpful if I did not show you HOW I made it. So I decided to make another Aura that I thought would be useful. I made a simple number writing worksheet. You can download it here: number writing practice sheet. It is useful in its own right – students can practice tracing numbers, then write them on their own. However, the COOL part is that if you scan over the top of the page you will see a video of me writing the numbers and singing our number writing song.
Here is a step by step of how I made the Aura. Follow the red arrows throughout to find the buttons I am mentioning.
1. You must download the Aurasma app (available on iOS and Android).
2. Take a video of something that you want to link to a photo. Since I did this on my phone, I used my iphone to take the video. I filmed myself writing the numbers and singing as I did.
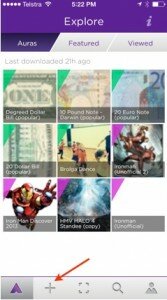
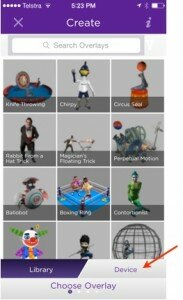
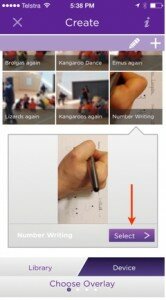
3. Open up the Aurasma app. You will have a screen like this. If you don’t, click on the small arrow/A shape at the bottom, and it will bring you to this screen. Then click on the “+” at the bottom of the screen.
4. Click on “Device.”
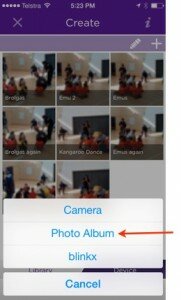
5. Click on the “+” sign in the upper right corner.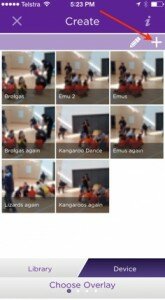
6. Choose your VIDEO. Since I had already filmed it on my phone, I went to my Photo Album to retrieve it.
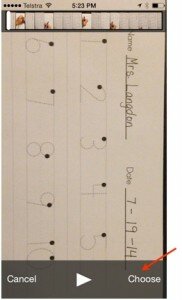
7. Select your video. I found that it had to be one minute or less, or it was too big for the app.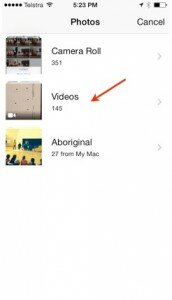
9. Your device will compress and process the video clip.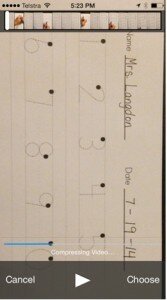
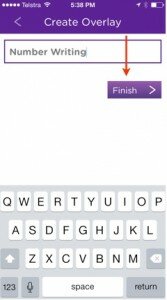
10. Name your overlay (video).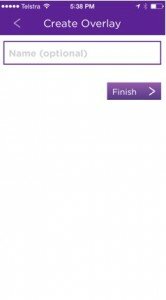
11. Click “Finish.”
12. Your device will create the overlay.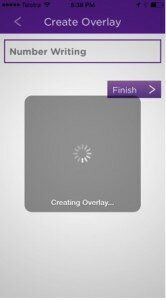
13. You then need to choose this overlay from the list that appears. (It may be the only one that is there. If you have created several overlays, you will see them all.)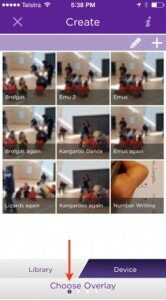
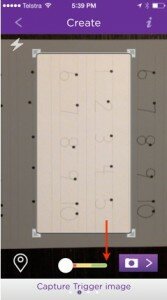
15. You will then need to take a “trigger” image. This is the photo or image that you will ultimately scan that will link to the video clip. In order to have a good trigger image, you need the silver dot to be all the way to the right, at the green end of the selector. Obviously my image below was not good. Sometimes tilting the device a little helps to achieve a quality trigger image. You can also grab the arrows around the selector to resize the image area.
16. Once you take the photo, the device will process it.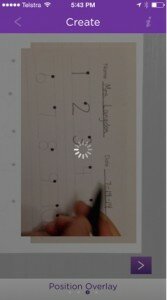
17. You will then name your photo. In this area you can also Add it to a Channel, which you SHOULD do.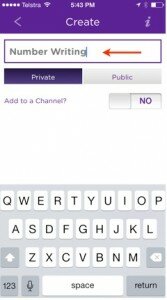
18. Name and describe your channel, and add a photo if you like. This is how you will be able to share the Aura with others (parents, colleagues, etc.)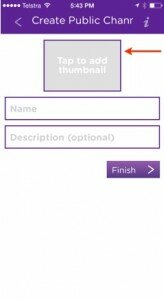
19. You also MUST make the Aura public. This is the only way anyone other than YOU can see the Aura.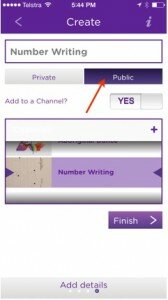
20. You will get a message like this when the Aura is created.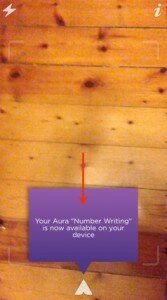
21. In order to test out your Aura, click on the cross hairs button from your menu.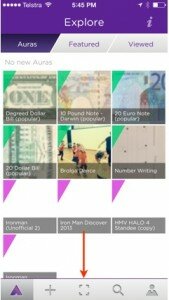
22. When you hold your device, with the scanner open, over the trigger image, you will see this purple swirl when it is beginning to detect the video.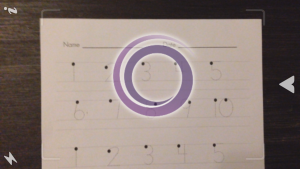
23. When the device links to the video, you will be able to watch the video over the image!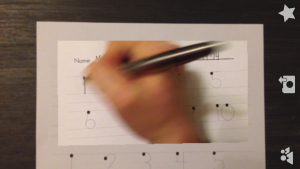
So this, of course, is how I made it. I would love for you, my wonderful readers, to download my number writing practice sheet, follow my channel on Aurasma, and see if you can see my Aura! (my video clip). You SHOULD be able to. However, this part has been a bit tricky for me, and I am not completely sure if I have shared it correctly. My Aura works beautifully on my phone, but is inconsistent on my husband’s phone. It would be a HUGE help to me if you tested it out. And if it DOES work, you can see how cool it is first hand! (You can also go to the Aurasma website and test out some of their Auras – it is pretty amazing!)
In order to follow me, on the main screen click on the magnifying glass (the search icon). Search for my channel – Number Writing (Karen Langdon). When it comes up, click “Follow.” You should then be able to see the Aura when you hold your device (with the scanner open) over the number writing page (you will want to print that out first).
Let me know in the comments how you think this type of technology could be useful in your classroom and teaching.


WOW! I have not even SCRATCHED the surface of the technology options available. Thanks for sharing this really cool idea!
Technology is incredible, isn’t it?!
Wow! This sounds like an amazing way to incorporate technology in the classroom. I am pinning this post to try later.
The Traveling Teacher
Thanks! I hope you have fun with it – I couldn’t stop playing with it!
Sounds Interesting. Would be great to have instructions for stations on it too in case kids forget they can watch the video and not interrupt. It can be a 2nd teacher – sort of. I am thinking since I only have 1 Ipad (my own) – record the different stations instructions with picture so they know which one to click. Kind of like a HUB for questions – go see Mr. IPAD. Interesting. I will go check it out. Thanks for sharing!
Tonya
The Way I Teach
Great thinking! I definitely think having the ipad available for repeat instructions is very smart. At the great PD I mentioned we discussed how to automate the parts of teaching that we can in order to free ourselves up to do the things that cannot be automated. Douch likened it to the safety instructions on airlines. They are now automated videos (that are often quite entertaining!) People watch the videos with more interest than they ever listened to the flight attendants because they are entertaining. And the flight attendants are then free to look after the people on the plane. So, in your example, a few entertaining videos explaining centers can do that job, and you can be free to do something else – like meeting with students! I do think, though, that it would be tough to use Aurasma for that purpose. You could probably just have a few video clips ready on the ipad. Aurasma is more useful if there are more devices available I would think. But, let me know if you give it a try!